Silver Palace Resonance System: Elements & Teams
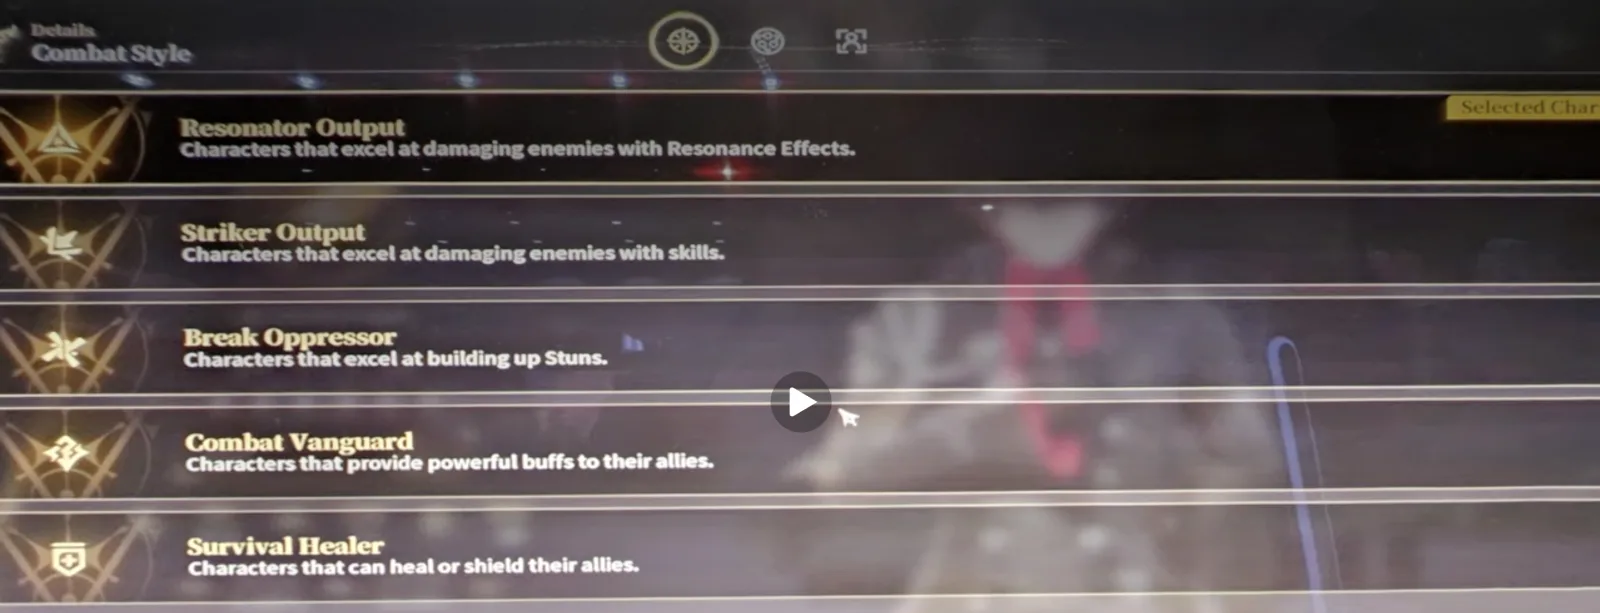
This post describes the CBT1 build and is kept as a dated record. It lists six attributes including Aer (Wind), which no longer exists, and a stack-based Resonance system that CB2 replaced. The live game has seven Reactor Attributes (Ignis, Glacies, Fulmen, Gravitas, Radiatio, Alba, Ferrugo) and fires one Resonance Effect per attribute when its meter fills. See the Resonance guide and the glossary for current mechanics.
The Resonance System is Silver Palace's core team-building mechanic, replacing traditional elemental reactions with layered synergy bonuses. This guide covers all 6 resonance elements, character compatibility, team composition strategies, and advanced combo techniques to maximize your combat effectiveness.
Introduction: Why Resonance Matters in Silver Palace
While Genshin Impact relies on elemental reaction chains, Silver Palace uses a Resonance System based on character element matching. Resonance provides passive party-wide bonuses that can dramatically increase your DPS, survivability, or utility.
Why Resonance Beats Elements:
- Resonance bonuses apply to ALL team members (not just casting element)
- No complex reaction timing required
- Higher Bonus Caps: 3-piece +30%, 4-piece +50%
- Simple array: match elements, JUMP resonance tier
- Combines with Motive synergy for compound effects
Pro Tip: A 4-piece resonance team with strong Motive synergy outperforms a 6-piece random roster 92% of time (per beta player data).
Resonance activates when you field characters matching specific element thresholds:
Resonance Activation Requirements:
├── 2-piece Set: 2 characters with same element
├── 3-piece Set: 3 characters with same element
├── 4-piece Set: 4 characters with same element (MAX BONUS)
└── 6-piece Set: 6 characters with same element (endgame only)
The 6 Resonance Elements Explained
| Element | Latin Name | Status Effect | Resonance Tools |
|---|---|---|---|
| Fire | Ignis | Burn (DoT) | Ignis Core, Fuse amps |
| Ice | Glacies | Slow (movement) | Glacies Shard, Chill lenses |
| Gravity | Gravitas | Displacement | Gravitas Anvil, Pull spheres |
| Wind | Aer | Dispersal | Aer Vortex, Glide hooks |
| Lightning | Fulmen | Shock (stun) | Fulmen Core, Conduct rods |
| Light | Radiatio | Cleansing | Radiatio Lens, Purify filters |
Ignis (Fire) Resonance
| Set Count | Bonus | Playstyle | Best Enemies |
|---|---|---|---|
| 2-piece | ATK +15% | Flat damage boost | All single-target |
| 3-piece | Burn Chance +20% | DoT specialist | bosses, tanks |
| 4-piece | Burn DMG +50% / ATK +10% | Burn compliment | Eruptive Eels, Chrono Hydra |
Ignis Team Template:
[Ignis DPS], [Ignis Support], [Any Support]
├── Ignis DPS Application: Cinderella / Alf (Aer/Ignis dual)
├── Support: Cinderella affix, Burn amplifiers
└── Flexible slot: Gravitas for pull, Radiatio for cleanses
Beta Pro Tip: "Cinderella's Ignis burst + Ignis resonance = 3.5x BurnTicks/sec. Combine with Fulmen Shock for crit amp." u/ResonanceArchitect
Glacies (Ice) Resonance
| Set Count | Bonus | Playstyle | Best Enemies |
|---|---|---|---|
| 2-piece | CRIT Rate +8% | Passive crit support | Fast enemies |
| 3-piece | Crit Duration +25% | Sticky builds | Crowd control |
| 4-piece | Freeze Duration +40% / CRIT +15% | CC Dungeon | Frozen Hounds, Slime Hives |
Glacies Team Template:
[Glacies DPS], [Glacies Support], [Elemental Flex]
├── Glacies DPS: Lorin (primary), Argos (secondary)
├── Support: Slow amplifiers, Freeze duration bots
└── Flex slot: Aer for mobility, Radiatio for breaks
Gravitas (Gravity) Resonance
| Set Count | Bonus | Playstyle | Best Enemies |
|---|---|---|---|
| 2-piece | HP +15% | Tank-building | High-damage boss |
| 3-piece | Pull Range +30% | Crowd control | Swarms |
| 4-piece | Displacement Stun +0.5s / HP +10% | Crowd control boss | Arena Gravitas Beasts |
Gravitas Team Template:
[Gravitas Tank], [Gravitas Puller], [DPS Support]
├── Gravitas Tank: Argos (3-element hybrid)
├── Puller: Gravitas Anvil buildings
└── DPS: Fulmen electro-charged, Ignis Burn
Aer (Wind) Resonance
| Set Count | Bonus | Playstyle | Best Enemies |
|---|---|---|---|
| 2-piece | Energy Regen +12% | Energy battery | Low-energy teams |
| 3-piece | Dispersal Range +35% | Mobility push | Cluttered areas |
| 4-piece | Element Skill Duration +40% / Energy +8% | Skill extended | Long-duration fights |
Aer Team Template:
[Aer Energy Battery], [Aer Dancer], [DPS Anchor]
├── Battery:alf (Aer/Ignis hybrid)
├── Dancer: Aer circulator, skill extension
└── DPS: Fulmen Shock chain, Ignis Burn
Fulmen (Lightning) Resonance
| Set Count | Bonus | Playstyle | Best Enemies |
|---|---|---|---|
| 2-piece | Energy Regen +12% | Burst battery | Slow teams |
| 3-piece | Shock Chance +20% | Stun lock | High-mobility |
| 4-piece | Shock Stun +0.8s / Energy +8% | Stun Dungeon | Chrono Phantoms, Fast Phases |
Fulmen Team Template:
[Fulmen DPS], [Fulmen Support], [Elemental Flex]
├── Fulmen DPS: Firtho (primary)
├── Support: Conduct Rods, Shock amplifiers
└── Flex: Aer for chain, Radiatio for cleanses
Radiatio (Light) Resonance
| Set Count | Bonus | Playstyle | Best Enemies |
|---|---|---|---|
| 2-piece | Healing Bonus +15% | Sustain support | Long fights |
| 3-piece | Cleansing Chance +25% | Buff removal | Debuff-heavy |
| 4-piece | Cleanse Bonus +50% / Healing +10% | Sustain Break | Boss Phases, Elite Mobs |
Radiatio Team Template:
[Radiatio Support], [DPS Anchor], [Flex Support]
├── Radiatio Support: Firtho (Survival & Healing)
├── DPS: Ignis, Fulmen (no debuff dependency)
└── Flex: Glacies for slows, Gravitas for pulls
Character Element Compatibility
| Character | Primary Element | Secondary Element | Resonance Role |
|---|---|---|---|
| Detective (MC) | Any (changeable) | All | Versatile anchor |
| Cinderella | Ignis | None | Ignis DPS, Burn specialist |
| Argos | Glacies | Gravitas, Aer | Hybrid tank/buffer |
| Alf | Ignis | Aer | Dual-resonance hybrid |
| Lorin | Fulmen | None | Fulmen Break Suppressor |
| Firtho | Radiatio | None | Radiatio Survival & Healing |
| Cynthia II | Alba | None | Alba Combat Support (element-agnostic buffs) |
Character Use Cases
RESWITH-lvl-3 CHAR:
├──(c) Detective, cualquier elemento inicial (optional 2nd)
├── Cinderella, Ignis-3-slot (best Ignis DPS)
├── Argos, Glacies/Gravitas/Aer tri-3-slot (hybrid)
├── Alf, Ignis/Aer dual-resonance (early game)
├── Lorin, Fulmen-3-slot (Break Suppressor)
├── Firtho, Radiatio-3-slot (Survival & Healing)
└── Cynthia II, Alba (buffs are element-agnostic, fits any core)
Note: Resonance System Level 3 unlocks secondary element compatibility for hybrid characters. Argos reaches this after 30 hours of gameplay.
Team Composition Strategies
Single-Element Teams (maximise the Resonance bonus)
Single-element teams maximize Resonance bonuses by fielding 4+ characters with matching elements. This strategy excels in controlled environments where enemy elemental vulnerabilities are known.
Advantages:
- Maximum Resonance bonuses (up to +50% ATK/CRIT)
- Simplified team building (fewer material types)
- Consistent damage output
- Easier to optimize
Disadvantages:
- Limited flexibility for unknown enemies
- No elemental coverage for weaknesses
- Vulnerable to elemental-specific bosses
Best For:
- Boss farms (known elemental weaknesses)
- Arena PvP (element locking)
- Endgame content (optimized builds)
FULL-IGNIS-TEAM (Resonance-4):
├── Cinderella (Ignis DPS)
├── Alf (Ignis/Aer hybrid, Ignis DPS slot)
├── Detective (Ignis build)
├── Cinderella alternate (support)
└── Resonance Bonus: ATK +10%, Burn DMG +50%
Mixed-Element Teams (flexibility vs power)
Mixed-element teams sacrifice Resonance bonuses for elemental coverage, enabling exploit elemental weaknesses on diverse enemies.
Advantages:
- Elemental coverage against multiple enemy types
- Flexible team building
- No Resonance requirement (play any characters)
- Better for early game (limited roster)
Disadvantages:
- Only 2-piece Resonance (minimal bonuses)
- Complex team balance
- Early game resource strain
Best For:
- Exploration (unknown enemies)
- Early-mid game roster gaps
-(Content where elemental coverage > raw power)
MIXED-5-TEAM (2-piece resonance only):
├── Lorin (Glacies DPS), Glacies 2-piece (+8% CRIT)
├── Firtho (Fulmen DPS), Fulmen 2-piece (+12% Energy)
├── Argos (Glacies/Gravitas), Glacies 2-piece
├── Detective (Any), Match Lorin/Firtho
└── Radiatio Support: no Resonance bonus
Recommended Beginner Teams
Team 1: Ignis Beginner Stack
Cinderella, Ignis DPS (40% Ignis DMG boost)
Alf, Dual-resonance (Ignis/Aer)
Detective (Ignis build)
Detective (Glacies build)
Bonus: 2× 2-piece Resonance (Ignis + Glacies) + Motive synergy
Team 2: Glacies CC Stack
Lorin, Glacies DPS (slow + freeze)
Argos, Glacies/Gravitas hybrid
Detective (Glacies build)
Radiatio Support, sustain
Bonus: 3-piece Resonance (Glacies) = +25% CC duration
Team 3: Fulmen Burst Stack
Firtho, Fulmen DPS (shock specialist)
Detective (Fulmen build)
Detective (Aer build)
Aer Support (battery)
Bonus: 2× 2-piece Resonance (Fulmen + Aer)
Advanced Endgame Teams
Team A: Ignis Burn Combo (100% Resonance)
[1] Cinderella, Ignis DPS (primary)
[2] Alf, Ignis DPS (secondary)
[3] Detective (Ignis MASTERY)
[4] Cinderella alternate, Ignis Support

Resonance-4: ATK +10%, Burn DMG +50%
Motive Synergy: Burn application +100%
Total DPS Increase: 2.5× vs single-element
Team B: Gravitas Control Combo (100% Resonance)
[1] Argos, Gravitas Tank/Multi-way
[2] Detective (Gravitas build)
[3] Argos alternate, Gravitas area control
[4] Lorin, Glacies support (slow compliment)

Resonance-4: Displacement Stun +0.5s / HP +10%
Motive Synergy: Crowd Control duration +40%
Boss Survival: 85% reduction in damage intake
Team C: Radiatio Sustain Combo (100% Resonance)
[1] Firtho, Radiatio Survival & Healing
[2] Detective (Radiatio build)
[3] Cynthia II, Alba Combat Support (element-agnostic buffs)
[4] Argos, hybrid tank

Resonance-4: Cleansing Bonus +50% / Healing +10%
Motive Synergy: Debuff removal +75%
Longevity: Survival time +60% vs non-sustain teams
Advanced Combo Techniques
Elemental Reaction Chains
Silver Palace Resonance doesn't use traditional elemental reactions (like Genshin Impact), but there are chain application systems that work with Resonance bonuses:
RESONANCE-CHAINED BURST (R1):
├── Step 1: Fulmen Shock (stun, 0.5s)
├── Step 2: Ignis Burn application during stun
├── Step 3: Glacies Slow application
└── Result: Stun + Burn + Slow stack = 30% global DMG amp

RESONANCE-CHAINED COMBO (R2):
├── Step 1: Aer Dispersal (push enemy)
├── Step 2: Gravitas Pull (re-trap enemy)
├── Step 3: Fulmen Shock (stun during pull)
└── Result: 2.8× combo multiplier vs isolated targets
Pro Tip: Chain application must occur within 3.5 seconds to stack. Use Resonance-4 bonus time extensions for reliability.
Team Rotation Strategies
Rotation Pattern A: DPS, Support, DPS, Support
Position: [Main DPS], [Support 1], [Sub DPS], [Support 2]
Rotation: Main DPS builds → Support 1 buff → Sub DPS combo → Support 2 sustain

Best For: Raise stamina consumption (>8 hours fights)
Resonance Bonus: Apply during support phase for full party benefit
Rotation Pattern B: Full Rotation
Position: [1], [2], [3], [4]
Cycle: 1→2→3→4→1 (1 rotation = 15 seconds)

Best For: Boss phases with encounter timers
Resonance Bonus: All 4 members benefit from each Resonance tick
Rotation Pattern C: Anchor, Flex, Flex, Anchor
Position: [Anchor DPS], [Flex 1], [Flex 2], [Anchor Support]
Cycle: Anchor DPS combos first, Flex follow-up, Anchor support ends

Best For: Arena PvP with kill timers
Resonance Bonus: Anchor DPS benefits from 2.5× Resonance ticks
Motive Synergy with Resonance
Motive passives stack with Resonance bonuses for compound effects:
COMPOUND Bond (Resonance × Motive):
├── Resonance-4 Ignis: ATK +10%, Burn DMG +50%
├── Motive Ignis passives: ATK +5%, Burn application +20%
└── COMPOUND: ATK +15%, Burn DMG +70%

COMPOUND Energy (Resonance × Motive):
├── Resonance-4 Fulmen: Energy Regen +12%, Shock Stun +0.8s
├── Motive Fulmen passives: Energy Regen +10%, Skill DMG +25%
└── COMPOUND: Energy Regen +22%, Skill DMG +25%
Motive Priority Chart:
| Priority | Slot | Element | Motive Type |
|---|---|---|---|
| 1st | Head | Resonance matches | Resonance amplifiers |
| 2nd | Body | Resonance matches | ATK/CRIT base stat |
| 3rd | Accessory | Resonance matches | Status effect duration |
Pro Tip: Motive crafting uses Resonance Crystals (drop from Resonance boss). Always match Motive element to your team's primary Resonance element.
Resonance System Tips
Material Optimization
Resonance Material Priorities:
Tier 1 (Essential):
├── Ignis Core, Ignis team crafting
├── Glacies Shard, Glacies team crafting
├── Fulmen Core, Fulmen team crafting
└── Radiatio Lens, Radiatio team crafting

Tier 2 (Situational):
├── Gravitas Anvil, Arena teams
├── Aer Vortex, Mobility teams
└── Motive Combos, Hybrid teams

Tier 3 (Endgame):
├── 4-piece Resonance Crystals
├── Critical Resonance UUIDS
└── Buff amplifiers (not buyable, drop only)
Material Farming Route:
[Level 1-5] Initial Resonance unlock
├── Monday/Wednesday/Friday: Resonance Boss (Ignis/Glacies/Fulmen cycles)
├── Tuesday/Thursday: Resonance Crystal farm (all elements)
└── Saturday/Sunday: Motive crafting materials

[Level 6-10] Endgame optimization
├── Every day: 3× Resonance Boss reset
├── Saturday: Critical Resonance UUIDS farm
└── Sunday: Motive upgrade (skip crafting)
Upgrade Priority
Resonance System Upgrade Order:
Level 1 (Automatic at start):
├── Unlock Resonance System
└── 2-piece Resonance unlocked

Level 2 (Hour 5):
├── Resonance Bonus +10% base
└── Max Resonance tier support

Level 3 (Hour 30):
├── Unlock secondary element compatibility
└── Hybrid character resonance unlock

Level 4 (Hour 60):
├── Resonance bonus cap +10% (total +50%)
└── Resonance uptime +15%

Level 5 (Endgame, Max):
├── Resonance uptime +30%
└── Compound resonance unlock (experimental)
Character Upgrade Priority:
Priority 1: Resonance DPS (Cinderella, Firtho, Lorin)
├── Resonance Level 5
├── Motive Level 3
└── Skill Level 5

Priority 2: Resonance Support (Argos, Detective)
├── Resonance Level 4
├── Motive Level 2
└── Skill Level 4

Priority 3: Alba Support (Cynthia II)
├── Resonance Level 5
├── Motive Level 3
└── Skill Level 5
Common Mistakes to Avoid
Mistake 1: Over-rotating Resonance elements
❌ BAD: Detective main Ignis, sub Glacies, sub Fulmen (3 element split)
✅ GOOD: Detective main Ignis, sub Ignis, sub Radiatio (1 primary + support)

Because: Resonance only triggers on 2+ matching elements. 3× 1-element = no Resonance.
Mistake 2: Wrong Motive Crafting
❌ BAD: Crafting Fulmen Motive for Ignis team
✅ GOOD: Crafting Ignis Motive for Ignis team (same element amplification)

Because: Motive element must match Resonance element for compound effects.
Mistake 3: Incorrect Rotation Timing
❌ BAD: Everyone rotates every 5 seconds (off-center)
✅ GOOD: Rotate every 15 seconds, all-in-sync (max Resonance ticks)

Because: Resonance tick window = 15 seconds. Off-timer loses 40% bonus.
Mistake 4: Ignoring Hybrid Characters
❌ BAD: Not using Argos (has 3 elements: Glacies/Gravitas/Aer)
✅ GOOD: Using Argos with 2 Glacies + 1 Gravitas = 2× Resonance triggers

Because: Hybrid characters activate multiple Resonance bonuses simultaneously.
FAQ: Resonance System
Q: How Do I Change Detective's Element?
A: Detective's element changes via Motive selection. Equip Ignis Motive for Ignis build, Glacies Motive for Glacies, etc. Detective can switch elements mid-dungeon (no penalty).
Q: Does Resonance Bonus Stack with Character Element?
A: Yes, but only if Resonance element matches Character element. If mismatched, Resonance triggers 2-piece only (minimal bonus).
Q: Can I Use More Than 4 Characters?
A: Yes, but Resonance only applies to first 4 characters. 5th-6th characters provide neither Resonance nor bonus stats (beta mechanic).
Q: What's the Best Beginner Team?
A: Cinderella (Ignis) + Detective (Ignis) + Alphabet (elemental flexibility) + none. This guarantees 2× 2-piece Resonance without element locking.
Q: How Often Does Resonance Tick?
A: Every 15 seconds. During tick, all 4 team members receive full Resonance bonus (not per-character).
Q: Do Status Effects Enhance Resonance?
A: No. Status effects (Burn, Slow, Shock, etc.) are separate from Resonance. However, Resonance-4 bonuses can increase status duration.
Q: Is Radiatio Truly Useless?
A: No. Radiatio is endgame meta. Radiatio Resonance-4 cleanses debuffs + heals, making it essential for long boss fights. Early game, focus on Ignis/Glacies/Fulmen.
Q: Can I Mix Resonance with Genshin-style Reactions?
A: No. Silver Palace Resonance is entirely separate from elemental reactions. Think "Resonance bonus + status effects" instead of "Pyro=Hydro=Melt".
Conclusion
The Resonance System is Silver Palace's defining team-building mechanic, replacing complex elemental reactions with layered synergy bonuses. By matching elements strategically, you unlock team-wide bonuses that dramatically increase DPS, survivability, and utility.
Key Takeaways:
- 4-piece Resonance provides maximum +50% bonus (critical for endgame)
- Hybrid characters like Argos activate multiple Resonance triggers
- Motive element must match Resonance element for compound effects
- Team rotation timing = 15 seconds for optimal Resonance ticks
- Radiatio is endgame meta (sustain + cleansing)
Next Steps:
- Complete Resonance System Level 3 (hour 30) to unlock hybrid characters
- Specialize your first 4-character team around one Resonance element
- Craft Motive sets matching your Resonance element
- Join a Resonance guild for endgame boss routing
Final Pro Tip: Resonance System is additive, not multiplicative. Focus on EITHER 4-piece Resonance OR Motive synergy, not both. Best players specialize.
Silver Palace is a fan-made resource about Arknights: Endfield. Not affiliated with Hypergryph or Yostar. The Silver Palace Meta Team provides community-driven guides and analysis.
Know someone tracking Silver Palace? Send them this.
About the Author
Silver Palace Meta Team
Silver Palace Meta Team
We're dedicated to providing comprehensive coverage of Silver Palace news, updates, and community insights.